Designing & LCD MAME Cabinet - Putting the Parts Together
The Cabinet Design
 |
| Assembly of MAME Cabinet |
X-Arcade Tankstick + Trackball Controller
The X-Arcade Controller comes as a self-contained unit (i.e. the controller panel sits on/in a box that contains all the wires and side buttons). Since I wanted the controller to look completely integrated into my cabinet,
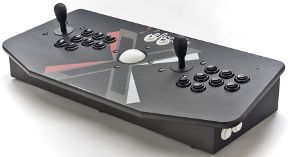 |
| X-Arcade Tankstick + Trackball |
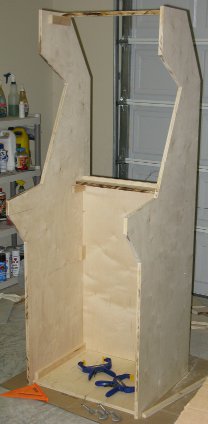
Assembling the Cabinet
I started by measuring and then clamping the blocks to the inside of the cabinet sides. I traced an outline around the blocks for later placement. Next I drilled holes from the outside of the cabinet into the blocks. The next step was to drill a countersink hole in each screw hole so the screw heads would be slightly below the outside surface of the cabinet. A countersink bit works nicely, but if not available, a drill bit that is slightly larger than the screw head can be used (be careful to only drill deep enough to sink the screw head). After drilling the holes, I removed the blocks and spread a thin layer of wood glue on then and then permanently screwed them to the cabinet sides.
After installing the blocks for the bottom and the back of the cabinet, I drilled and screwed the bottom and the lower back plywood pieces to the cabinet. After the upper blocks were in place, I screwed in a temporary piece of wood to help the cabinet hold its shape while I measured and cut additional parts of the cabinet.
I decided that I wanted the entire lower-front part of the cabinet to be a door so that I would have easy access to the computer components inside. I also decided that I wanted the upper-back part of the cabinet to be a door so access to the monitor would be convenient.